This article is a quick example of how you can run the Ubuntu 22.04 Desktop version of Linux on a Windows 10 or 11 Pro computer with Hyper-V. It is not an instructional setup for Hyper-V and assumes you already have Hyper-V set up and running on your system. The method of installation may be slightly different than the way you normally set up Windows images in Hyper-V, and I hope that this instruction will run through it for you in a smooth and trouble-free way.
Firstly, download the installation source (ISO file) of Ubuntu from the Ubuntu official site. At the time of this writing, it is located here: https://ubuntu.com/download/desktop
Only a 64-bit version is used now.
It would be a very good idea to check the MD5 hash is correct so that you know the download is not corrupt.
Place the file somewhere on your Windows PC in a suitable folder for now.
Start the Hyper-V Manager and in the console make sure the host computer name is highlighted in the left pane. In the Actions pane on the right side, select Quick Create. This will work much better than the more normal method of selecting New > Virtual Machine as you likely would have done for Windows image creations.
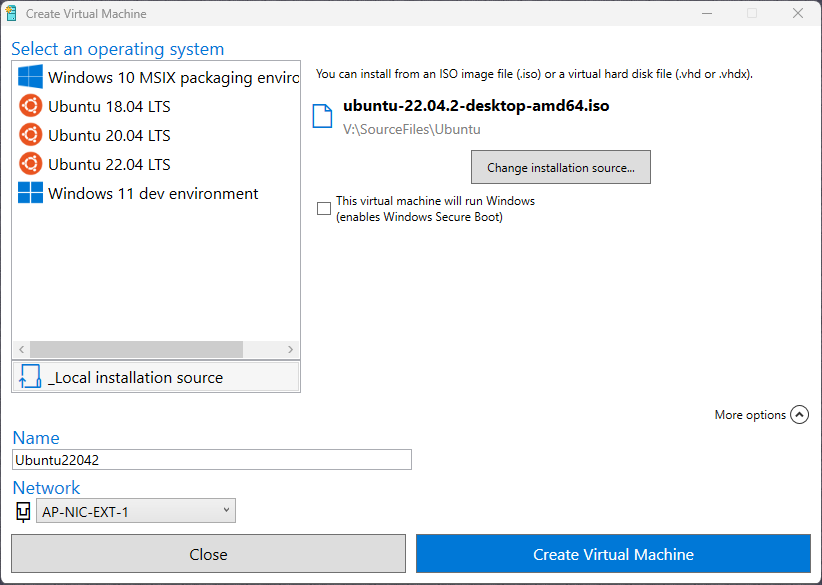
In the Create Virtual Machine page that appears, don’t select any operating system from the list. Also hit the arrow next to More options at the lower-right.
In the Name field (lower-left), enter a name for your new virtual machine. I usually use the same name for the virtual machine and the actual Linux hostname. Below that select a network switch that can access the outside Internet.
Now on the left side, select Local installation source. Uncheck the box next to This virtual machine will run Windows.
At the upper right select Change installation source…
Browse for the ISO file you downloaded previously, then select Open.
So it should all look something like this:

Select the blue button labeled Create Virtual Machine and the new virtual image is created. It just consists of the virtual framework at the moment. We still need to add the operating system.
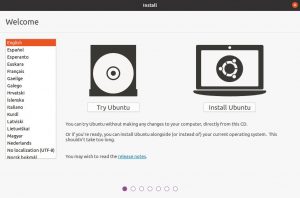
At the pop-up on the screen, select Connect and in the resultant connection window select Start. There is no need to press or select anything right now – just let it run until you see the Install screen: It doesn’t look like it’s doing anything, but wait until you see this:

Select your preferred language (I will assume English for the purposes of this install) then select Install Ubuntu.
Select a suitable keyboard layout. There is a Detect Keyboard Layout if you really don’t know what to use, but it’s a bit of a long-winded way to test. Now press Continue.
In the next screen, I would keep the default options of Normal installation and leave all other options in this window unchecked. Press Continue.
In the Installation type screen, leave it at the default to Erase disk and install Ubuntu. Don’t worry – when it says erase disk it is talking about the virtual image you are creating – not your host system. There is nothing in Advanced features that you need right now. Select Install Now.
There will be a pop-up appear to ask you to Write the changes to disks? Again, this concerns the virtual image disks only, so just select Continue.
In the Where are you? Screen that appears next, if it has discovered your time zone correctly (even if the city is not exact) then press Continue. Otherwise select another time zone if it is not showing appropriately.
In the Who are you? Screen that appears next, enter your real name [optional] and the computer hostname, then your own logon credentials consisting of a login name and password. You can select whether to log in automatically when the computer starts, or to force you to enter a password (I chose Log in Automatically). Press Continue.
This is the point where the operating system is being fully installed and automatically configured. It takes just a few minutes to complete. At the Installation Complete notice, select Restart Now.
If the screen says, Please remove the installation medium, then press ENTER: then just put the mouse focus on that screen and press Enter.
If the installation is going to fail, then this is likely the point where you will see that failure.
You may see a black screen with four cycling dots in the middle, under the OS name. If this hangs for an unreasonable amount of time, press ESC and it may free it up to continue. If you see a prompt to press a key, then do so.
If that leads to other errors, you may need to select the Hyper-V Revert icon (green semi-circle arrow) and restart the installation. I have had some cases where it worked the second time after an initial failure. At worst case, download the ISO again and start from the beginning. These suggested fixes may be far faster than trying to figure out why the install failed, though with constantly repeated failures you may have to look more deeply.
If there is an option to Enable Ubuntu Pro, select Skip for now (it can be done later), then select Next.
At the Help Improve Ubuntu prompt, select an appropriate option (I chose No, don’t send system info) then select Next.
On the Privacy page, select whether you want to allow Locations Services, then Next.
On the You’re ready to go! page, select Done.
That’s it. You are now running the Ubuntu installation and you should see the default desktop.
A very quick basic tour of the desktop
If you are new to Ubuntu, then here is a very short look at the layout.
The icons on the left side point to some applications that are immediately accessible.
The top icon is a Firefox web browser.
Lower down is a Files icon. Select it to see the Home folders under your user profile. In the Files console, select + Other Locations in the left column and the main pane shows Computer, where you can see all of the folder structure of the computer.
Back on the desktop, there is an icon that looks like an orange suitcase. That is the Ubuntu Software environment. Select it and it will download a software catalog. At the top of the screen you may see a pop-up that appears later and then a new icon on the left. The icon on the left – an ‘A’ in a circle – is a Software Updater icon, which you can select to update software. If the software is fully up to date, you might not see the icon there at all.
Also on the left side is a Help icon, which opens up a Ubuntu Desktop Guide.
Right-click on the desktop background to see options, including to change the background wallpaper; change display settings; or select Settings for a host of other options you can alter.
Linux has traditionally been a command line controlled environment and the option is still there of course. To get a command prompt press the CTRL ALT T keys and you will be located at your Home folder (run the pwd command to check).
At the lower-left of the desktop is an icon made up of 3 x 3 dots. This is the Show Applications icon and selecting it brings you to a desktop menu of applications that are installed. Quite a few things to explore here.
At the upper-right of the desktop are four small icons, but are just one icon in reality. Selecting here will allow you to alter the system sound volume as well as log off or power off the computer.
This should all be enough to get you started and the ability to explore the environment and play around with some settings. A good first step is to update the operating system. Open a terminal window with Ctrl-Alt-T then run these commands:
sudo apt-get update. This will download the list of updates.
sudo apt-get upgrade. This updates the software.
sudo reboot. Restart Ubuntu. You should now be fully updated.